From Dated Media Center to Moody Traditional Coffee Bar: A 90s Cabinet Flip
*This post contains affiliate links. Please read my full disclosure here. Thank you for supporting my blog.*
We’ve all seen them at thrift stores, on Facebook Marketplace, or perhaps lingering in our parents' basements: the hulking, honey-oak media centers of the 1990s. Built for heavy tube TVs and stacks of DVDs, these pieces are often dismissed as "dated" or "clunky."
However, as a fan of the moody traditional and modern heritage aesthetic, I see these pieces differently. They represent solid craftsmanship, incredible storage depth, and, most importantly, a blank canvas for a high-end builder-grade transformation.
When my parents decided they no longer wanted their old oak cabinet, I knew it was time for a DIY intervention. Here is how I turned a 90s relic into the centerpiece of our home: a custom coffee bar.
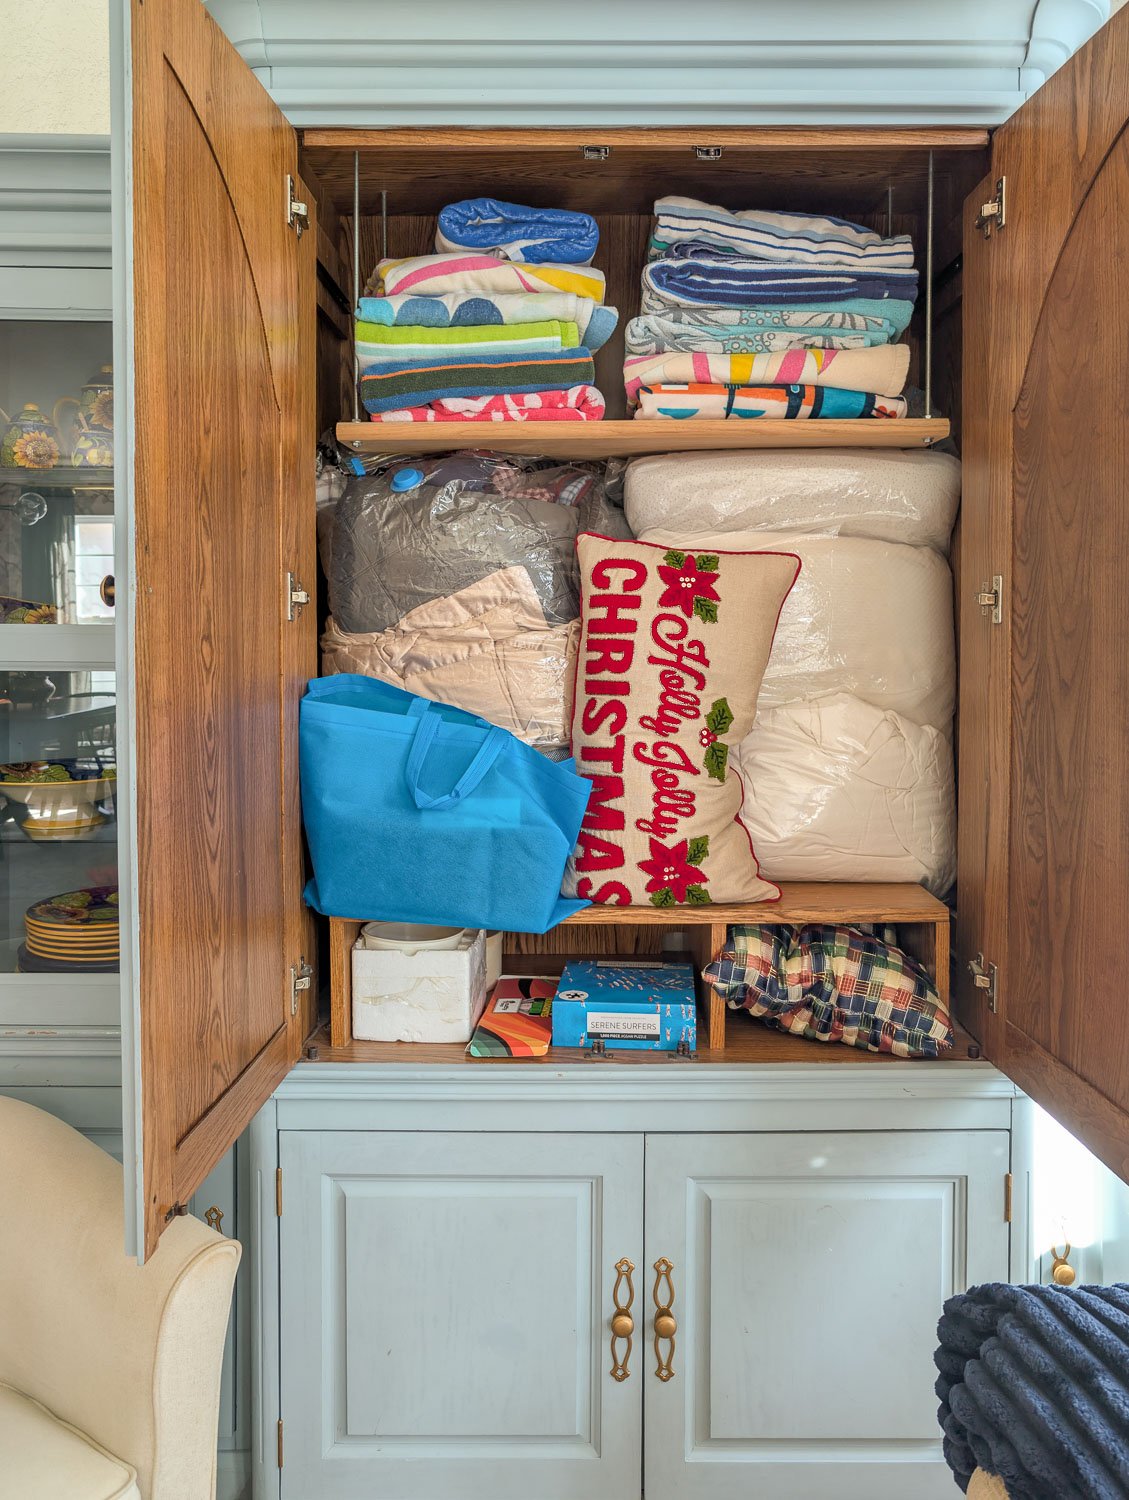
Reality check: Before it was a coffee bar, this cabinet was the ultimate catch-all for extra linens and holiday decor.
Why Rethink the 90s Media Cabinet?
Before we dive into the paint and power tools, let’s talk about why you shouldn't scroll past these pieces. In a world of fast furniture, these older units offer:
Deep Dimensions: The center cavity is usually 20-24 inches deep, perfect for professional-grade espresso machines like my Breville.
Solid Wood Construction: Unlike modern particle board, these cabinets can handle the weight of heavy stone or ceramic collections.
Architectural Interest: Many 90s units feature crown molding and trim that look incredibly expensive once they are updated with a sophisticated color palette.
The Design Vision: Moody Traditional Meets Modern Function
For this project, I wanted to move away from the farmhouse look of the oak finish and lean into a more Modern Heritage vibe. This means choosing colors that feel historic yet fresh.
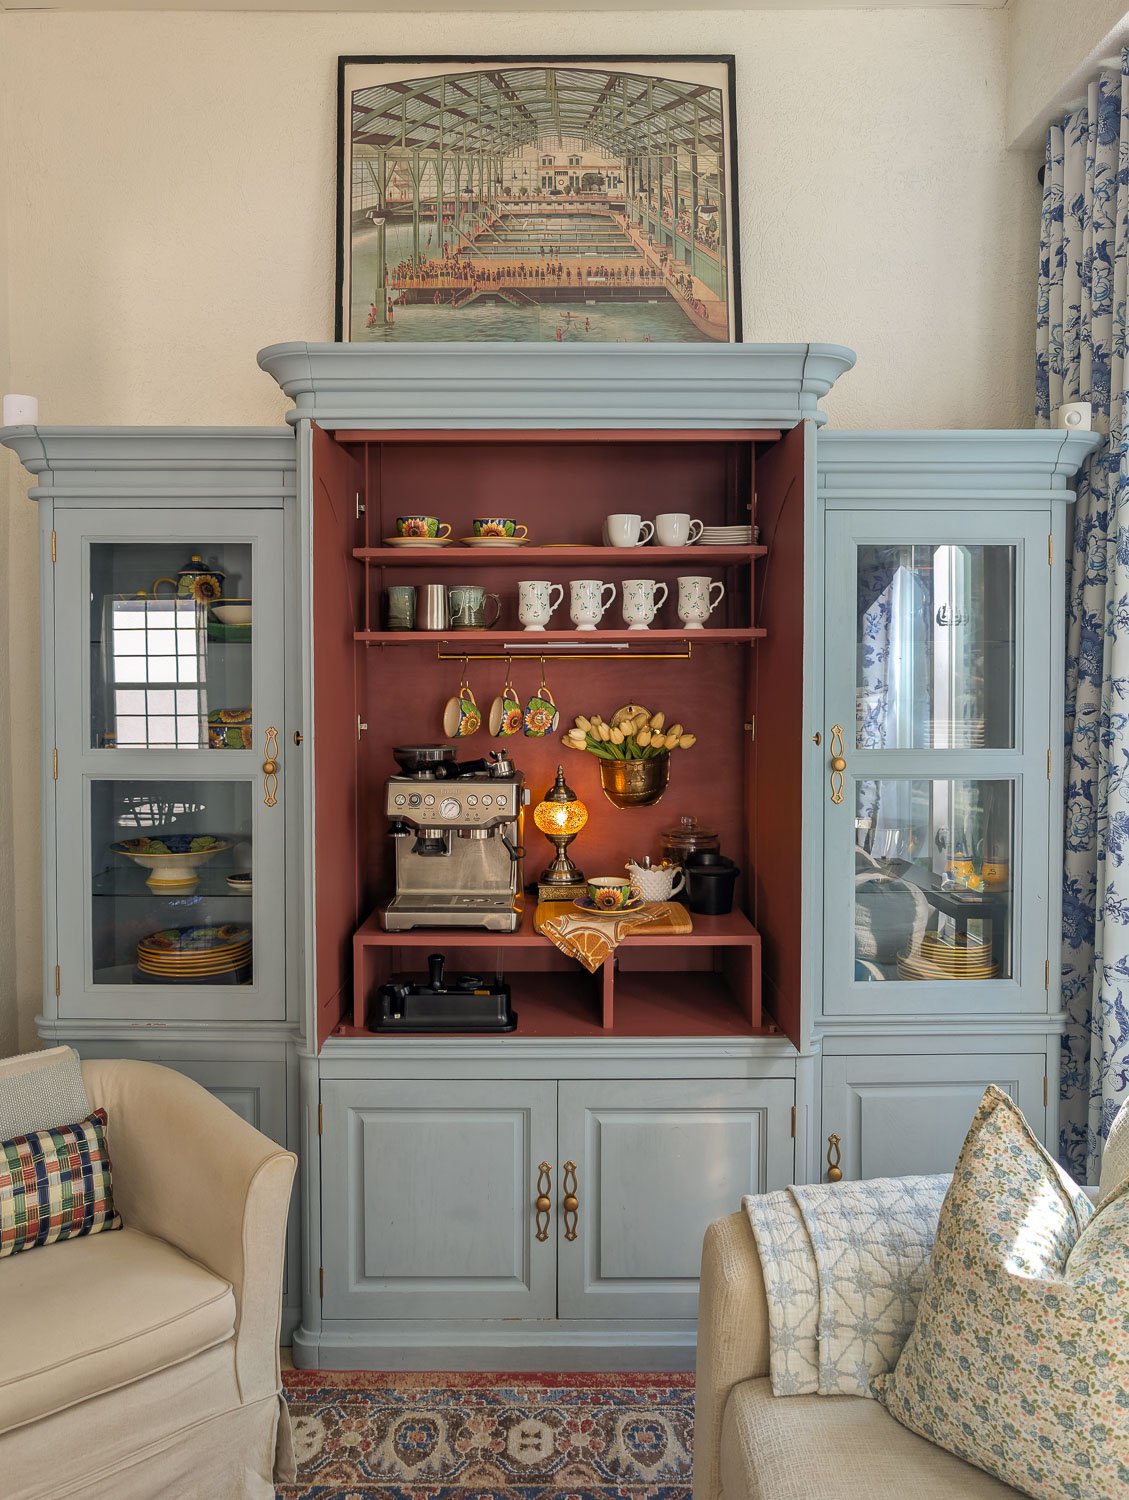
I settled on a high-contrast pairing: a soft, dusty light blue (‘Gingham’ by Behr Chalk Paints) for the exterior to keep the piece from feeling too heavy in the room, and a deep, dramatic, muted red (‘Fading Twilight’ by Benjamin Moore) for the interior. This pop of color inside creates a jewel-box effect when the doors are opened.
Step 1: Prepping and Modifying the "TV Hole"
The biggest challenge with media cabinets is the open space meant for the television.
Clearance: When planning the layout, my priority was ensuring enough clearance for our espresso machine while still squeezing in plenty of vertical storage. I toyed with the idea of removing the original sliding tracks and replacing them with standard hinges, but I ultimately realized the genius of the original design. We love being able to tuck the doors back into the cabinet while we're pulling shots in the morning, then sliding them shut for a clean, clutter-free look later in the day.
Shelving: I looked to a solution my dad created years ago, a hanging shelf system he originally built to house VCRs and 90s gadgets using _______ with washers and nuts. It was so sturdy and functional that I decided to replicate his method, simply adding a second tier to maximize our mug storage.
Structural Backing: To create a cohesive look, I cut a piece of 1/4-inch plywood to fit the back of the center opening. This covers the old cable holes and gives you a smooth surface for painting. I left about an inch at the bottom open so that I could pass cables with ease. It would be covered anyways with the structure to raise the espresso machine to counter height.
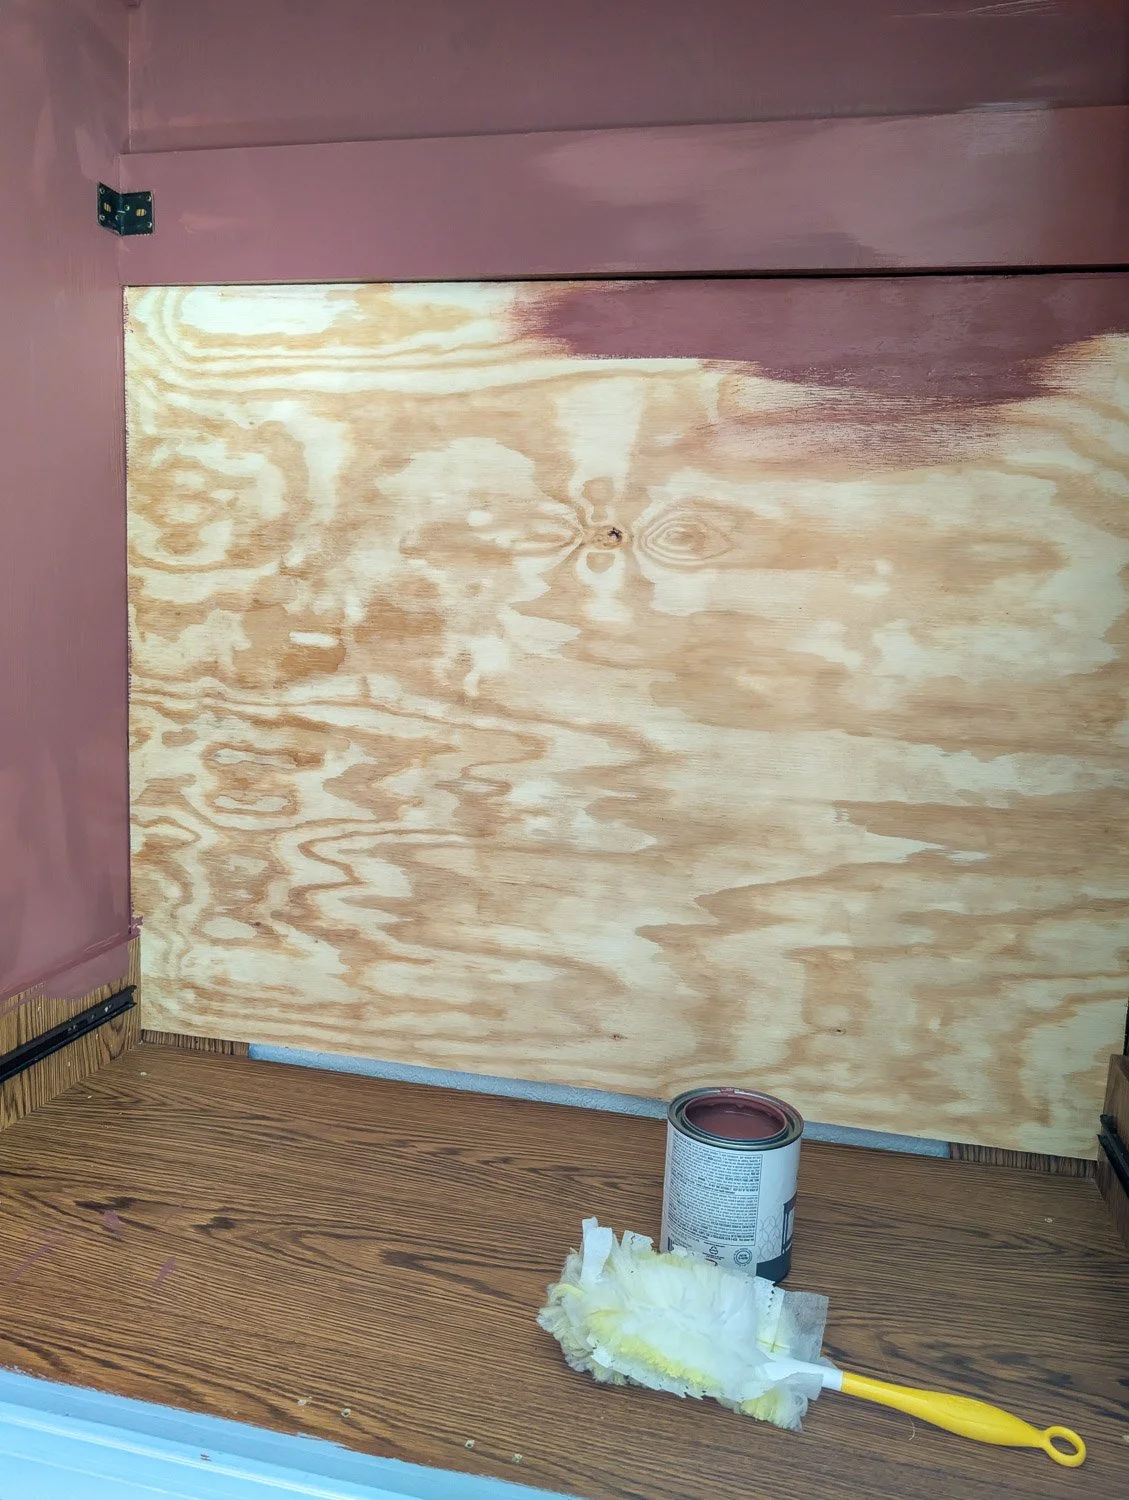
A simple piece of plywood makes a world of difference. This creates a smooth, professional surface for that moody red paint.
Step 2: The Magic of Chalk Paint
To achieve that Moody Traditional finish without hours of sanding, I opted for chalk paint.
Exterior: Two coats of the light blue (Gingham by Behr). I didn't want it perfectly flat, so I used a high-quality brush to leave very subtle texture, giving it a hand-painted, heritage feel. I love that you can still see the wood grain pop through the paint.
Interior: This is where the drama happens. The deep red interior, Fading Twilight by Benjamin Moore (I recommend a matte or eggshell finish) adds instant depth.
Sealing: Always seal your coffee bar! Between steam from the espresso machine and occasional spills, I used a wax decorative finish (gave it 3 coats!) for chalk paint by Behr and so far has held up beautifully.
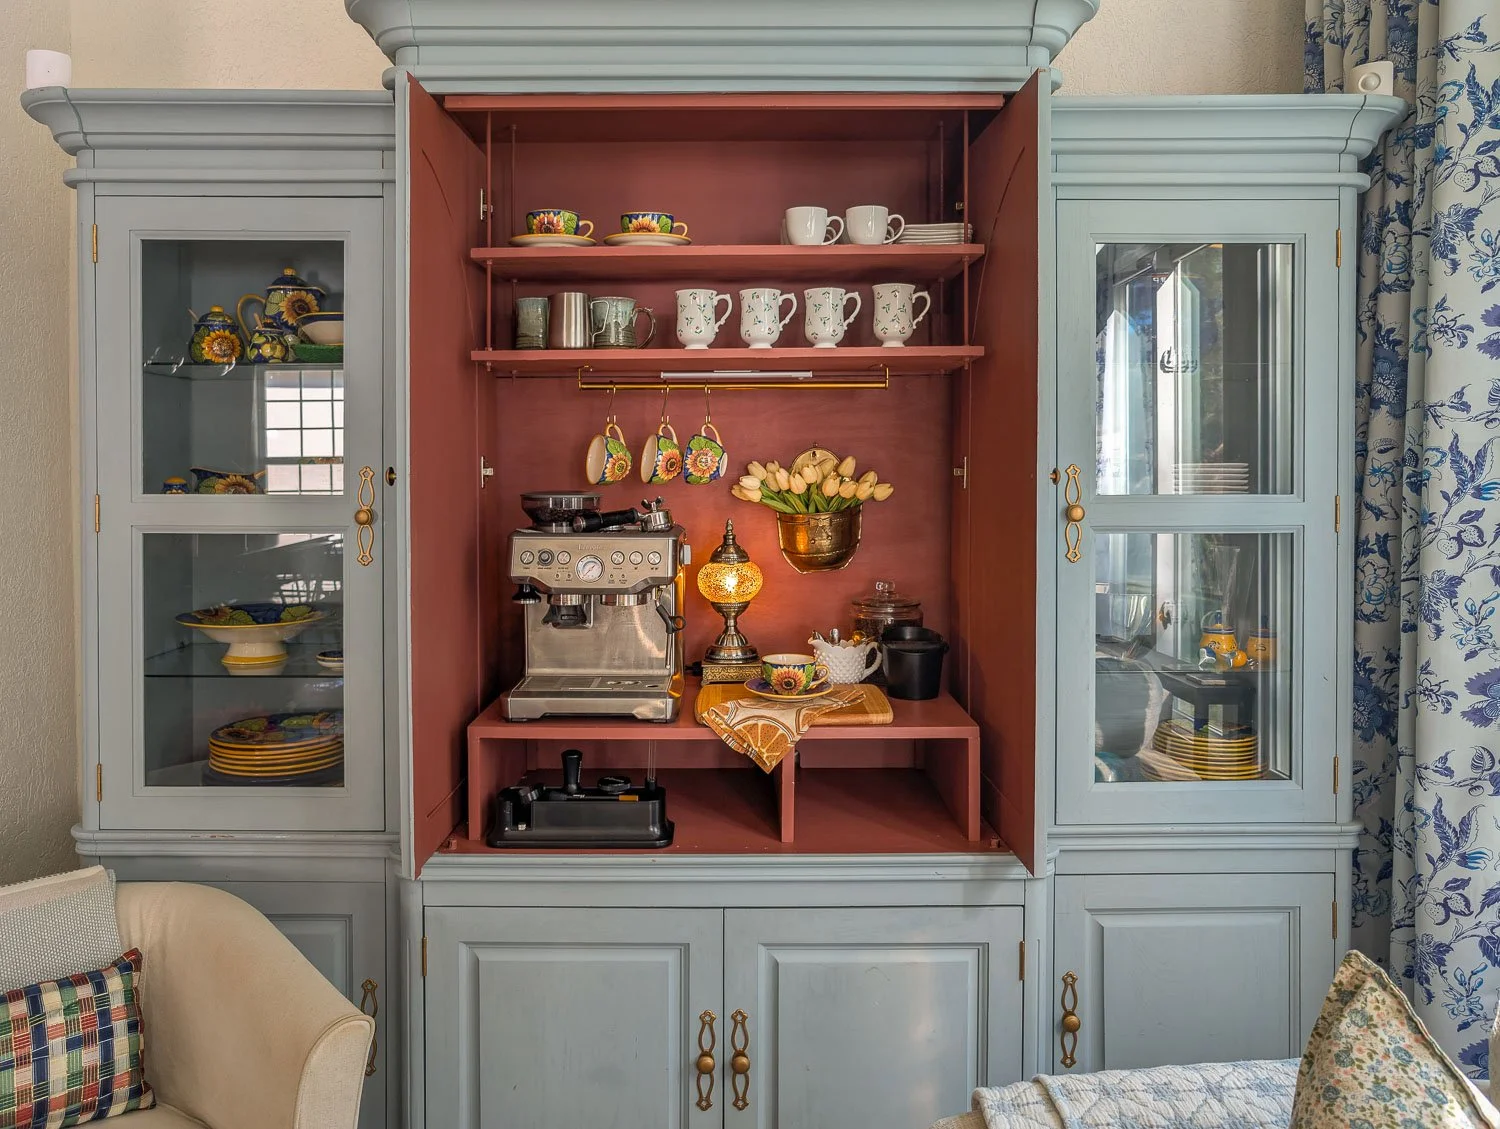
Completely transformed! The contrast between the light blue exterior and the deep red interior is the heart of this Moody Traditional look.
Step 3: High-End Hardware and Accents
Hardware is the jewelry of furniture. I didn’t replace the dated 90s pulls, but accented them with gold Rub ‘n Buff. They look SO good now! The gold against the blue provides that classic English-cottage feel that is central to the modern heritage style.
Pro-Tip: Don't forget the lighting! I installed a rechargeable motion sensor cabinet lights under the shelf to illuminate the red interior. It makes the coffee ritual feel like a luxury experience every morning.
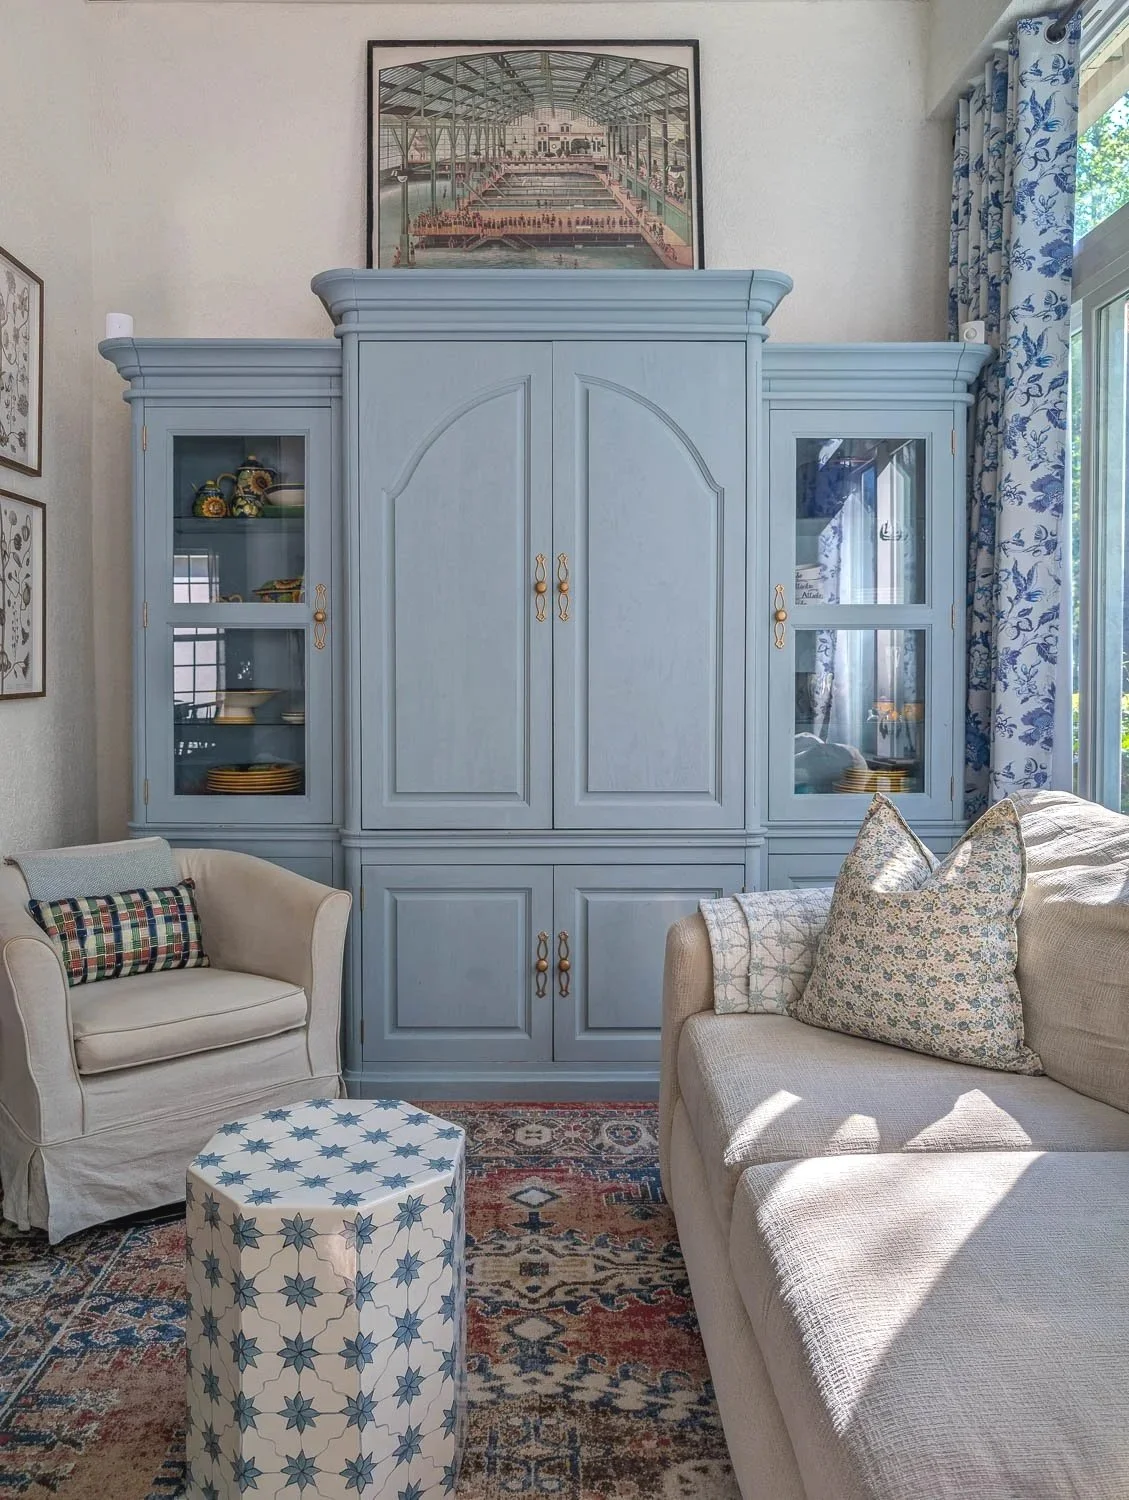
The final result: A 90s relic turned into a sophisticated, Modern Heritage focal point that grounds the whole room. Ceramic Accent Table | Throw Blanket | Curtains | Swivel Barrel Chair | Area Rug (similar)
Styling Your Moody Traditional Coffee Bar
The difference between a "project" and a "piece" is the styling. To finish the look:
Incorporate Texture: I added a brass wall pocket for faux tulips and used a Turkish-style lamp to provide warm ambient light.
Curate Your Ceramics: Displaying a mix of colorful mugs and sunflower-patterned saucers adds a layer of collected over time charm.
Functional Decor: Use a small wooden cutting board as a landing pad for your coffee spoon and sugar bowl to protect the painted surface.
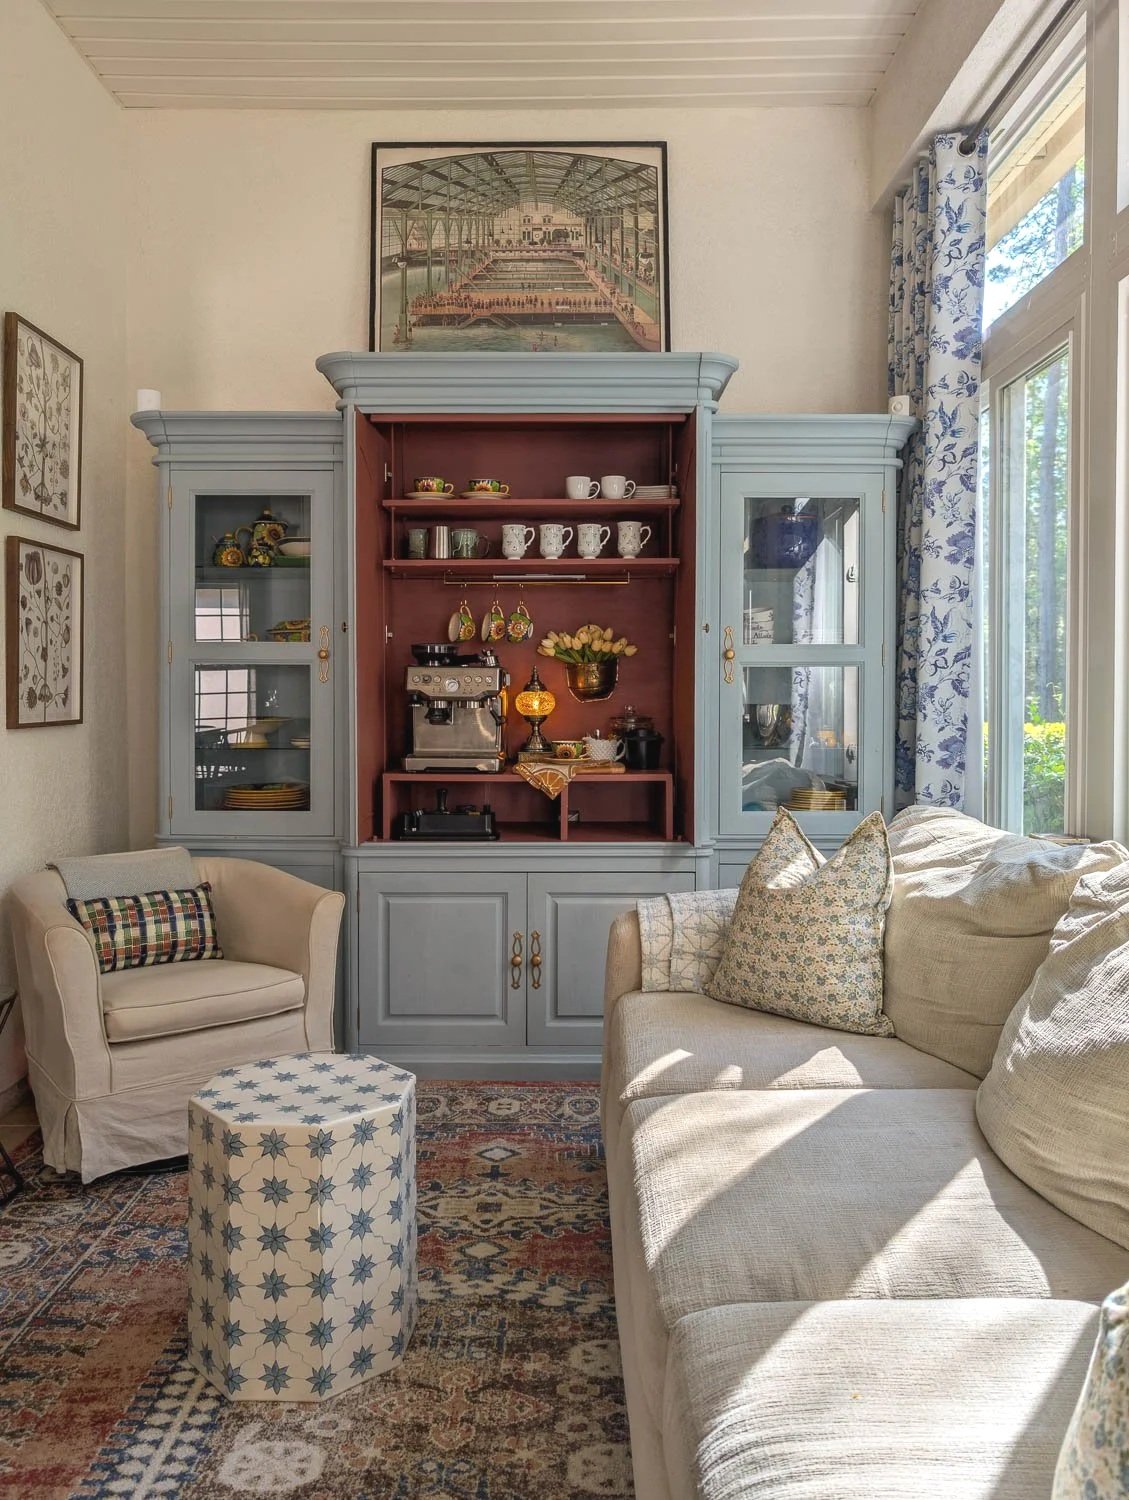
It’s all in the details. Brass accents and warm lighting make this feel more like a boutique cafe than a DIY project. Ceramic Accent Table | Throw Blanket | Curtains | Swivel Barrel Chair | Area Rug (similar)
Beyond the Coffee Bar: Other Ways to Reuse Media Units
If you don't need a caffeine station, consider these other builder-grade furniture flips:
The Hidden Home Office: Install a pull-out keyboard tray in the center and use the side cabinets for your printer and files.
A Baking Center: The deep shelves are ideal for stand mixers and large jars of flour and sugar.
A Playroom Wardrobe: Remove the doors entirely, add a hanging rod, and use it as a "dress-up" station for kids.
Final Thoughts
Don't let the orange-toned oak of the 90s scare you away. With a clear vision and a bit of paint, you can take a piece of “junk" and turn it into a high-end focal point that fits perfectly into a Moody Traditional home.
This flip cost me very little, mostly the price of paint and plywood, but it has added so much character to our living space.
After
Are you ready to tackle your own furniture flip? Tag me @housebythepreserve on Instagram so I can see your transformations!


I’m a mom of two and wife to a seriously supportive hubby, living our best life in our forever house by the preserve! I'm all about helping you create a stylish, Pinterest-worthy home on a budget. Let's obsess over interior design, home decor, DIY, and home improvement projects to help you create your best home. Follow along and say hello! I love hearing from you.
Currently Trending


Join me on Instagram!