$100 Room Challenge: Laundry Room Stenciled Walls
Welcome back to week 3 of the $100 Room Challenge! I can’t believe how fast September has already flown by. I’ve been super busy making over my small laundry room into a space that I hope will inspire me to keep up with my growing family’s laundry needs. It’s one of my least favorite chores but my hope is that by creating a pretty room that I don’t dread going into will translate into me beginning to enjoy the laundry process a little…a girl can dream right?!
If you are new here, the $100 Room Challenge was created by Erin from Lemons, Lavender, & Laundry where you get to refresh a room in your home for just $100 in one month. It’s a super fun process of using your creativity to help you create a room you love on a budget.
If you need to catch up and follow along the transformation:
Week 1: $100 Room Challenge: The Laundry Room
Week 2: $100 Room Challenge: Laundry Room Organization
Last week, you saw me tackle all things organization in this small space. It’s amazing what a little cleaning and organization can do to a space!
BEFORE
AFTER
I was so pleased with the result that I could have just stopped here and called it a day but if you’ve been following me for a while, you know that I love a little punch of color in every room. So I decided to do something in this space that I’ve been dying to do for a long time. STENCIL!
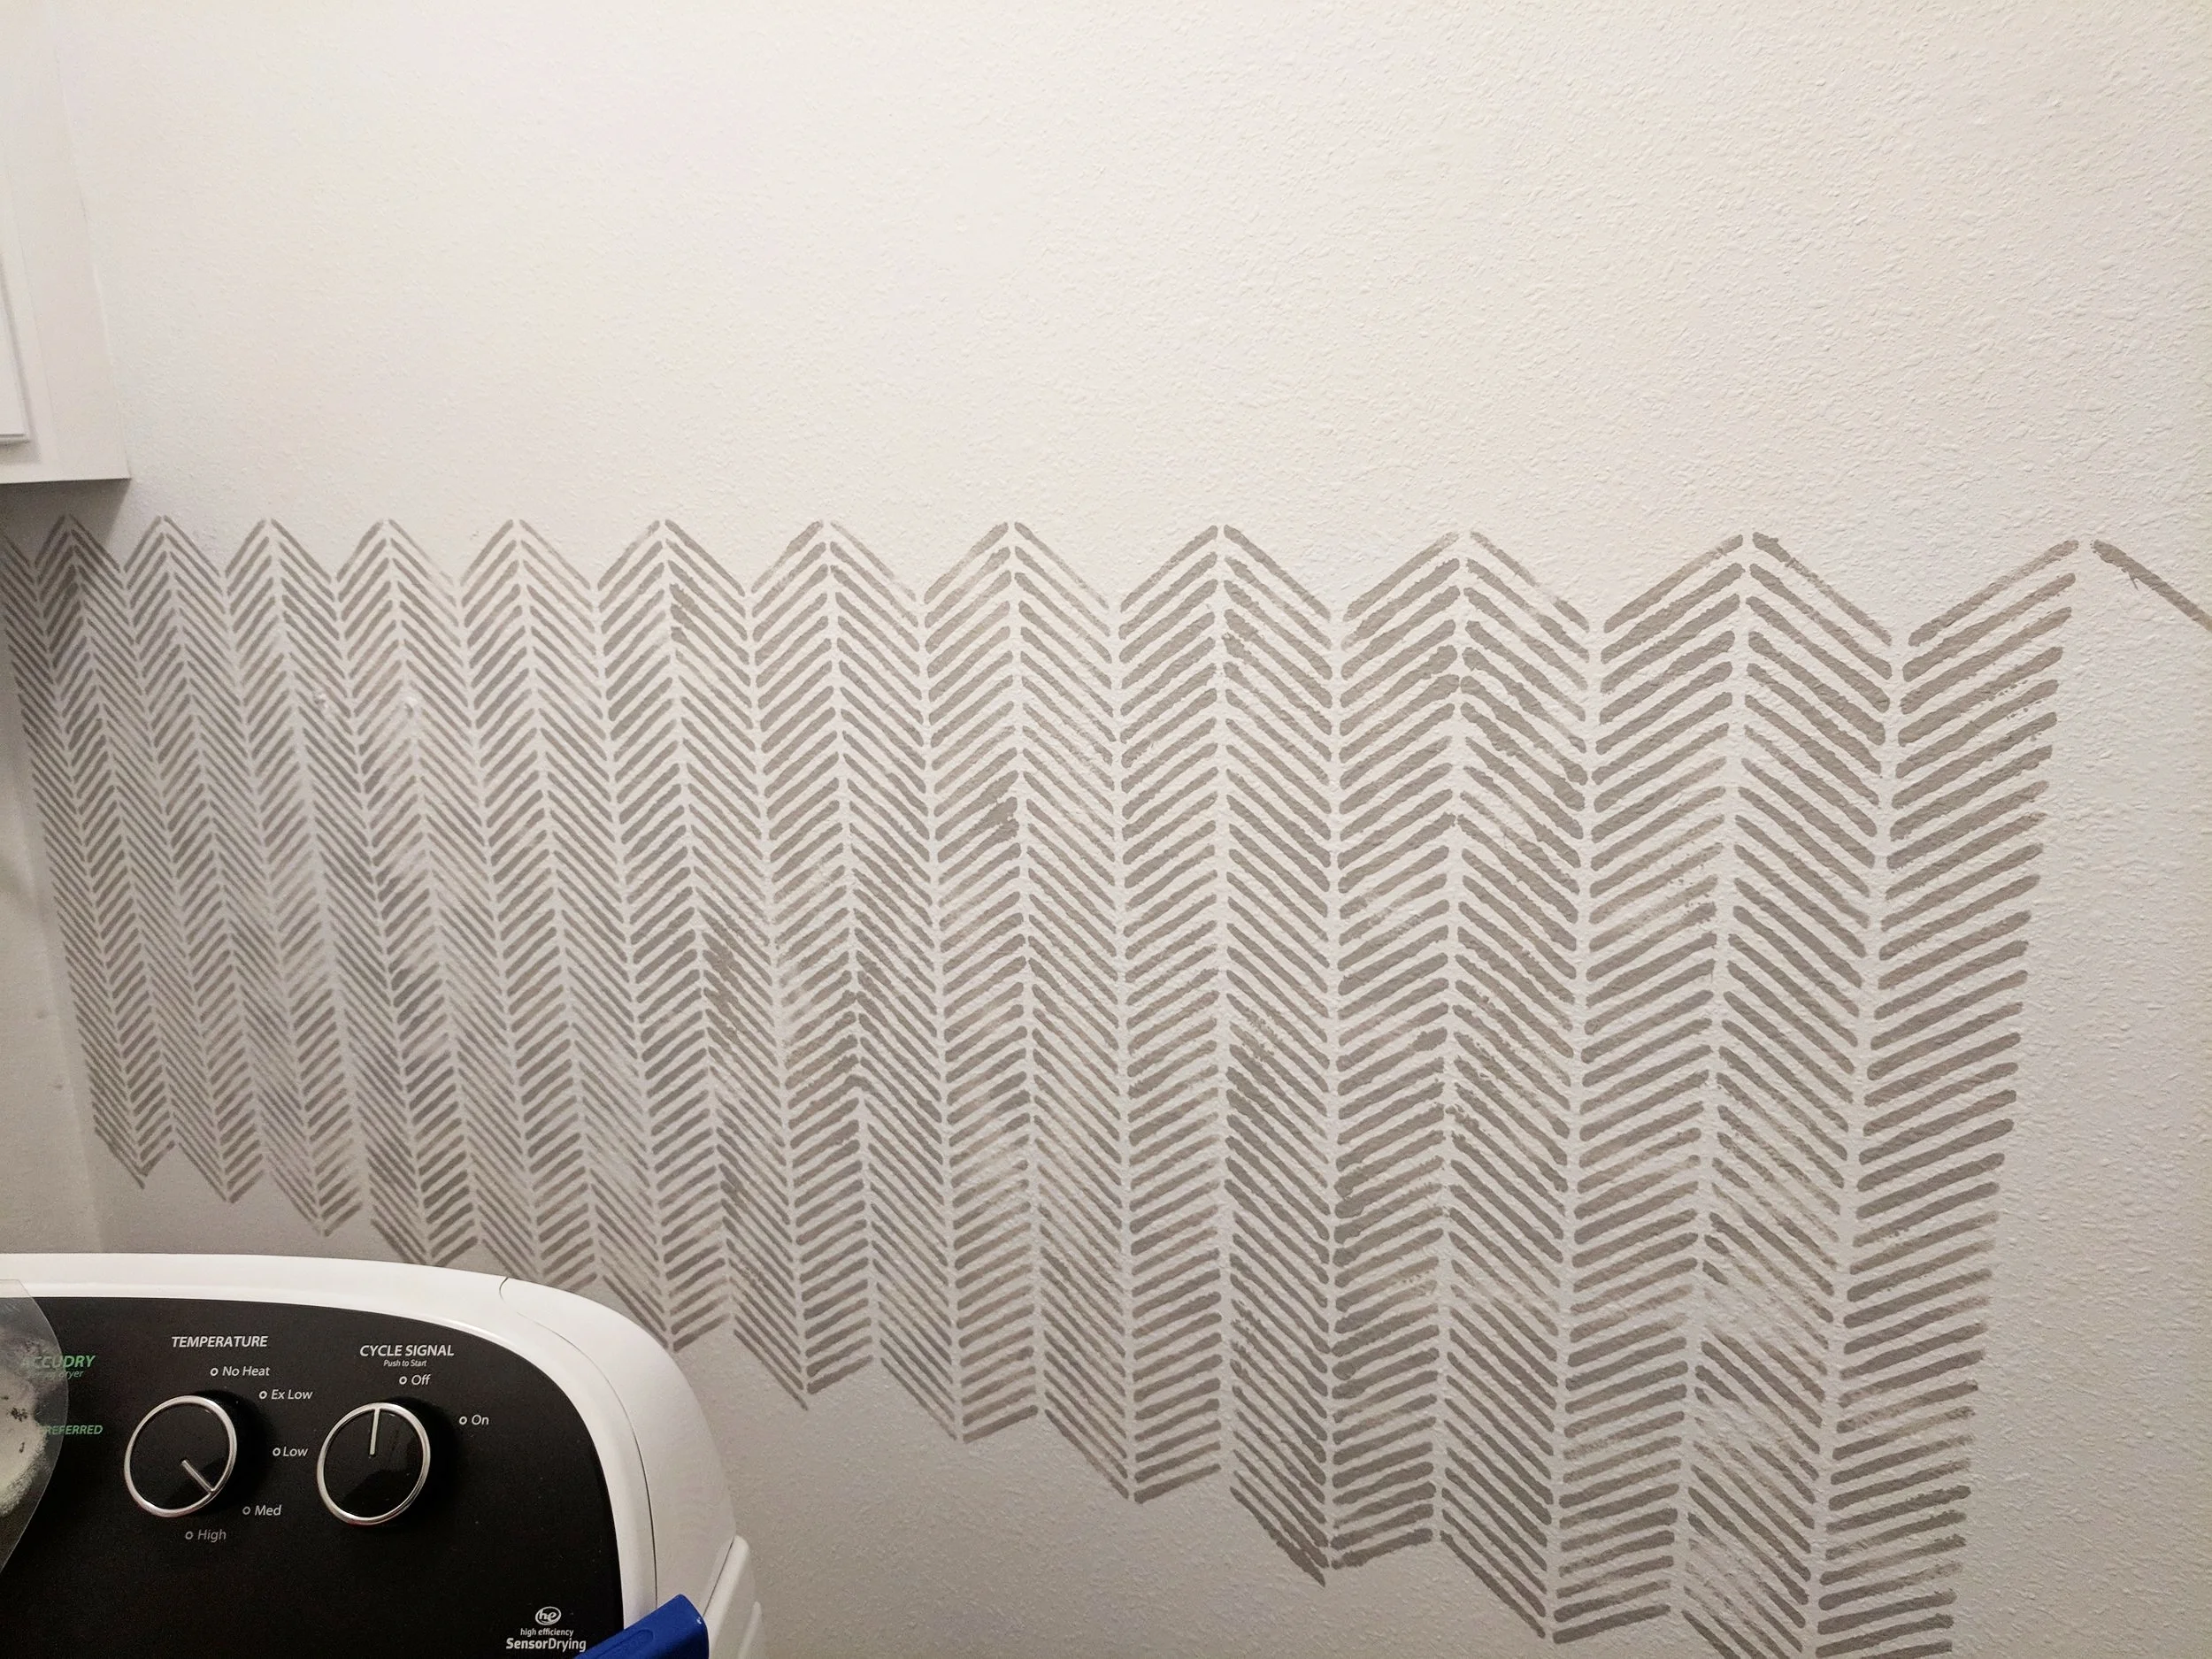
I had heard both good and bad things about wall stenciling and had always wanted to give it a shot. When selecting my stencil from Cutting Edge Stencils, I decided to focus on one that I knew I wouldn’t have to have perfect lines. We have textured walls and I new that the paint would bleed a little. After scouring all the beautiful stencils that Cutting Edge Stencils provides, I decided on the Herringbone Geometric Stencil.
I first painted the entire laundry room white and decided to use the light gray color (Behr Marquee, Natural Gray) that we have used throughout our home for the actual stencil. Since it’s such a small room without a window, I didn’t want to use a dark color for the fear of making the room too dark. The white base color definitely helped to brighten up the room.
Now it was time to start stenciling! I was pleasantly surprised that it was not difficult at all! I started on the corner and worked my way across the wall.
I really like how depending on the pressure I used with the foam roller there were some lighter and darker lines. I think that gives it more character and less uniform. After a couple of tries, I got hooked and quickly finished a whole wall. Can’t wait to show you the completed space next week for the reveal!
If you are contemplating using a stencil in your home here are a few tips:
Secure your stencil with blue painter’s tape so it helps keeps your stencil secure in one place.
I found that using a foam roller rather than a brush is best.
The less paint on your roller the better. After putting some paint on your roller, wipe off the excess on a paper towel.
Don’t be afraid to start! After all, it’s just paint! If you don’t end up loving you can simply paint over it!
Here's what I've accomplished so far and what I still have on my To-Do list:
COMPLETED
Clean and organize cabinets so that I'm able to fit all my laundry care items.
Add cabinet pulls to dress them up.
Paint black door white to help brighten the room.
Fun wall treatment - can't wait to show you what I have planned!
TO-DO
Update lighting - no more boob light!
Decorate - make it pretty and functional!
Add a fun detail to the interior laundry room door.
The Budget
Herringbone Geometric Stencil - Cutting Edge Stencils kindly provided this stencil to me for free. In the spirit of the challenge, I will still include the value of the stencil in my budget - $42.95
Behr Premium Plus white paint - $26.98
TOTAL: $69.93
Are you excited to see how it turns out?
Join me every Wednesday for the month of September where I'll share my progress with the final reveal on September 26th! Sign up before if you want to make sure you don't miss a thing and receive an email reminder with every post! (but don't worry, I'll never spam you!)
Can’t wait to share the completed space with you next week!
Want to see even more transformations? Check out below for even more ideas of what you can do with just $100 from these amazing group of bloggers!


